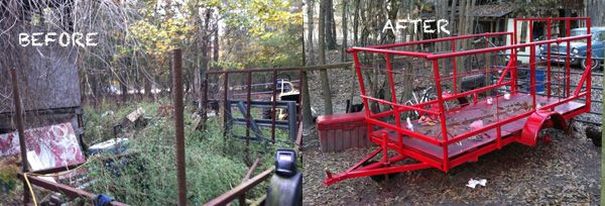
Never start a project that lasts over Christmas, New Years, and a vacation. It will drag out forever. I still have a little work but am through writing about this. Perhaps another picture when I have a truck to pull it with and am all done.
Hope you enjoy.
Hope you enjoy.
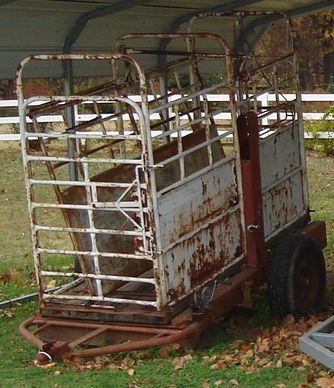 Raggedy old stock trailer courtesy of google images.
 Well here you see a stock trailer doing what it does best. It is just about the right size for a guy with a couple donkeys but I can't get past what it's doing in the picture.
What is it doing you ask. Well right now I would say that the paint is fading, the tires are becoming dry rotted, and chances are the grease in the axles is deteriorating. Might be more that's what I see right now.
To simplify, it's doing nothing.
What is it doing you ask. Well right now I would say that the paint is fading, the tires are becoming dry rotted, and chances are the grease in the axles is deteriorating. Might be more that's what I see right now.
To simplify, it's doing nothing.
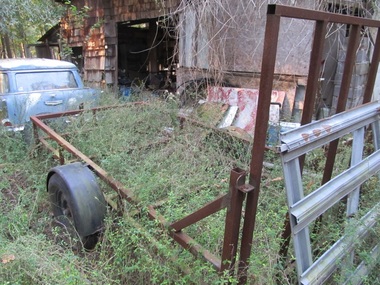 Raggedy old landscape trailer courtesy of my back yard.
 You could be asking yourselves what this has to do with anything. Well I need a trailer to move some donkeys. I needed it a while back. However, it's working on four months that I haven't had a truck so a trailer is useless. I did find one I could borrow but I absolutely hate that and I still would need to borrow a truck as well.
I sure don't need something that is going to spend the majority of it's estimated useful life sitting and rusting. What I need has to be useful and versatile.
I sure don't need something that is going to spend the majority of it's estimated useful life sitting and rusting. What I need has to be useful and versatile.
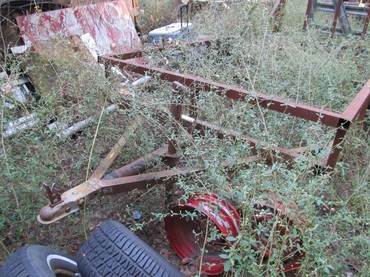
This unit has one big thing going for it and one against it as well. It has a wonderful tailgate (or the frame of one) and that is great. Going against it - it has no springs.
If the animals are up front the tires and the suspension of the tow vehicle will serve that purpose. These are, after all, sure footed donkeys, not oxen. On top of that, I am told frequently and in a very disparaging manner that I drive very slowly. I will do so intentionally with the critter(s) in the back.
If the animals are up front the tires and the suspension of the tow vehicle will serve that purpose. These are, after all, sure footed donkeys, not oxen. On top of that, I am told frequently and in a very disparaging manner that I drive very slowly. I will do so intentionally with the critter(s) in the back.
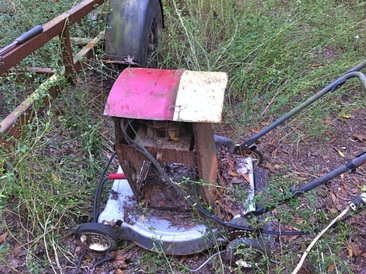
This is the high tech welder that I will use. I know that I've already said that in another post. That's ok. Sally says I repeat myself and at 70 years old, it's authorized.
This thing sure got lighter when I bolted it to the lawnmower.
This thing sure got lighter when I bolted it to the lawnmower.
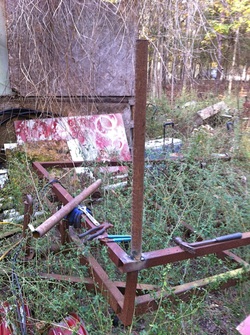
The sides are going 36" above the original sidewalls. This pole has the distinction of being the first. It's counterpart is resting on the rail.
The poles are from a water fire extinguishing system. That came from a school that was torn down. I purchased some of it about three years ago from a neighbor that had a part in the salvage. My church had an AC unit that was stolen and I made cages for three condensing units. These poles are what were left over plus some I was given from elsewhere.
The poles are from a water fire extinguishing system. That came from a school that was torn down. I purchased some of it about three years ago from a neighbor that had a part in the salvage. My church had an AC unit that was stolen and I made cages for three condensing units. These poles are what were left over plus some I was given from elsewhere.
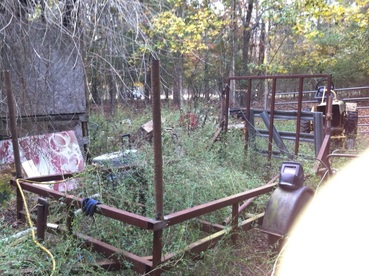
Just pulling back a little to give it perspective. I thought perhaps even more perspective would be gained if I included my finger in the picture.
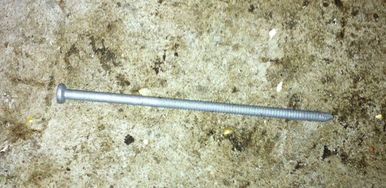
Since I have no chopsaw and am a natural born klutz, I need this to fill gaps and level things.
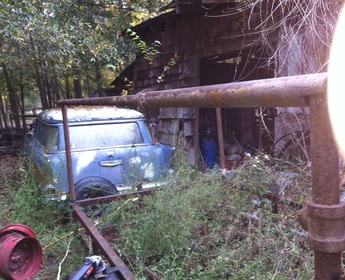
This is the first pole to run fore and aft. Obviously this is a little like building a shack on a trailer but no wood. You start similarly.
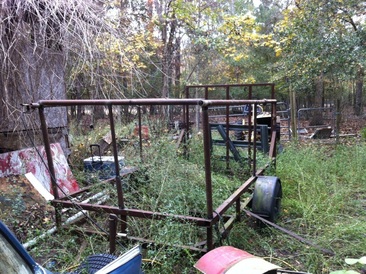
Once again, just to give this perspective.
Once one step is completed, the next step makes it stronger.
Once one step is completed, the next step makes it stronger.
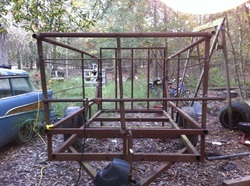
In this case, the next step was the crosspiece.
Van Gogh had his signature and so have others. The signature on my work is that nothing is very square or plumb.
As a redneck engineer I am obliged to relegate squares and levels to the traditional crowd.
Van Gogh had his signature and so have others. The signature on my work is that nothing is very square or plumb.
As a redneck engineer I am obliged to relegate squares and levels to the traditional crowd.
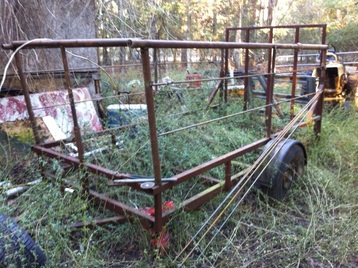
I was going to clean and rust convert some of these pieces before I attached them. Then I read the bottle. It said the temp needed to be a minimum of fifty degrees. Oh, well. Cleanup comes later.
The lines between the pipe and the long pieces on the fender are all 1/2" rebar.
The lines between the pipe and the long pieces on the fender are all 1/2" rebar.
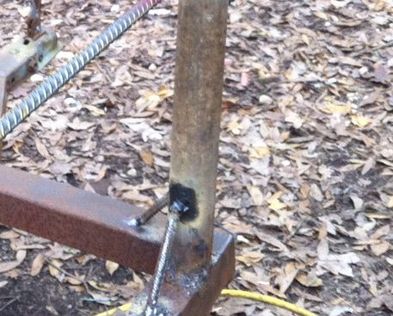
You can see that horizontal wall a bit closer here. This type corner serves to strengthen the weld and to provide for a tie down. The reinforcements are only 3/8.
Borrowed a truck from my SIL Kelly to get these.
Borrowed a truck from my SIL Kelly to get these.
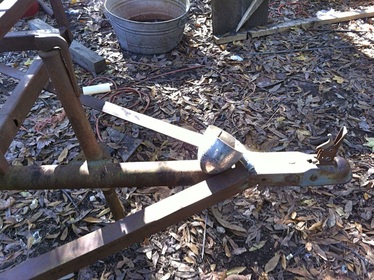
I coated all the surfaces except the very top with a grinder that had a wire brush mounted. Now to get started prepping.
Tomorrow if I retain my focus I will get a picture of the trailer on stands. Got it there with no jack except this tongue jack.
Btw the paint cup was a spotlight from a 64 mercury marauder. I say was because it was more fragile than I thought.
Tomorrow if I retain my focus I will get a picture of the trailer on stands. Got it there with no jack except this tongue jack.
Btw the paint cup was a spotlight from a 64 mercury marauder. I say was because it was more fragile than I thought.
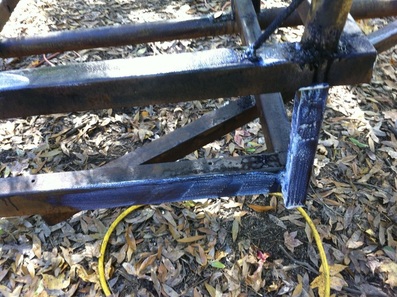
This frame is black because of the rust converter. Just brush it on with a cheap brush and cleanup is simple with water. It serves as a primer also but I tend to be pessimistic in that regard. Doesn't take long to prime also. I'm using Eastwood converter from Jegs via ebay.
By the time I was at the back the front was ready for the next step but I took a break.
By the time I was at the back the front was ready for the next step but I took a break.
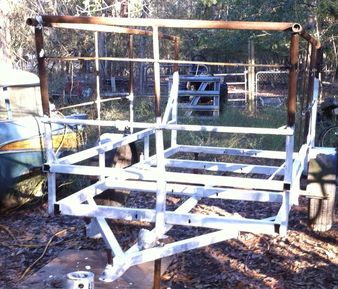
This is the primer that is supposed to work for any paint on top of the rust converter. Some of the rust converter has bled through.I am not using oil based primer here. It is advertised for all topcoats. I will go oil based with the paint. Have used about everything and oil based just takes longer to dry.
Next I will use my paint sprayer on the floor and sides. Put in the first layer of floor and paint the top.
Next I will use my paint sprayer on the floor and sides. Put in the first layer of floor and paint the top.
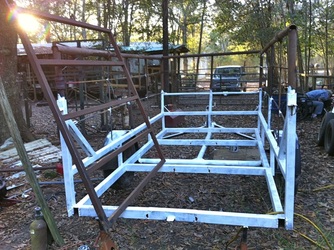
I pulled the tailgate off. I see some need for welding, then rust convert, prime, and paint.
I hibernate during the summer. Way too hot. Now I am working on all my projects. The 57 chevy is a future project and I'm trying to avoid painting it accidentally.
It has an interesting history:
http://www.curbsideclassic.com/my-curbside-classic/my-backyard-classic-1957-chevrolet-210-handyman-wagon-now-what/
If this doesn't become a link, just cut and paste in your browser for the background on the car.
To this point I have mostly just talked about fixing it. I'll get back to this as soon as my energy allows.
12/18/13
The plan today was to weld up certain joints. They were the result of sloppy work with cutting tools. Just to be honest, if I had the right tools for that they would still be sloppy cuts. That's just me. However, when it hits the road it will be strong.
The plan today was to weld up certain joints. They were the result of sloppy work with cutting tools. Just to be honest, if I had the right tools for that they would still be sloppy cuts. That's just me. However, when it hits the road it will be strong.
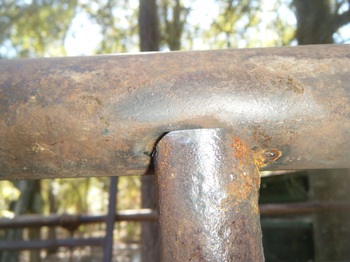
I wanted framework that would hold a donkey but it needed to be more versatile. I never claimed to be an artist and I am not. There were a lot of joints with gaps like this.
There aren't now.
There aren't now.
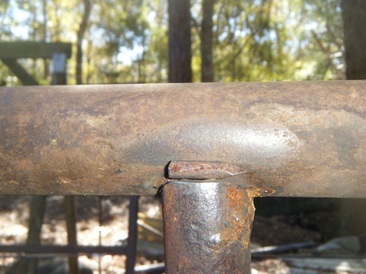
While there isn't much room in my life to worry about ugly joints, there is a need for strong ones. This piece of nail took care of that. All three pieces are melted together.
Landscape nails are good filler. It sort of is like brazing with a stick welder. I didn't know I couldn't, so I did.
Landscape nails are good filler. It sort of is like brazing with a stick welder. I didn't know I couldn't, so I did.
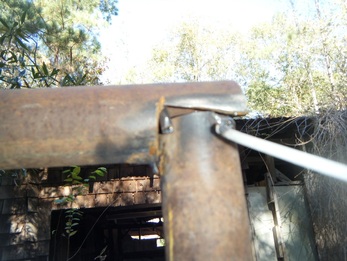
All I have is that junky old stick welder. Don't need to have a better welder without better skills. It's cheap and still works despite being ugly.
Then I needed to move the trailer to where I had compressed air for painting.
Then I needed to move the trailer to where I had compressed air for painting.
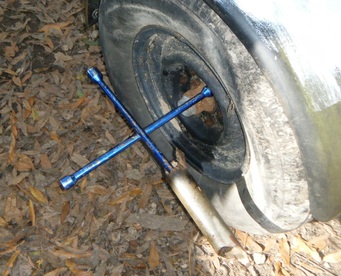
When it was in placeI I needed to pop the wheels off and paint behind them also. That comes later. First, always loosen the nuts with the tire on the ground. I did that before I moved it.
I have a little tip for those of you who might be old men or otherwise avoiding physical strain. The air wrench at the tire shop is stronger than you. That small piece of pipe stuck on the tire tool makes me a bunch stronger. When I was young my biggest fear was bending the tool. I know others that did that also. Now my worry is whether the nut is coming loose.
On the truck I had before this I cut the end of the pipe on a bevel. It was the only way to get the hubcaps off.
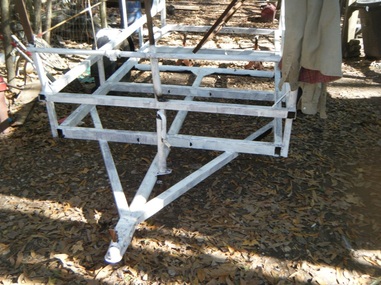
When I start to actually use this I will have a jack. Right now I don't have one dedicated to this and there is an easier way.
The first step is lowering it as far as it will go. I made sure there was air in the tires but obviously that is impractical if you have a flat.
The first step is lowering it as far as it will go. I made sure there was air in the tires but obviously that is impractical if you have a flat.
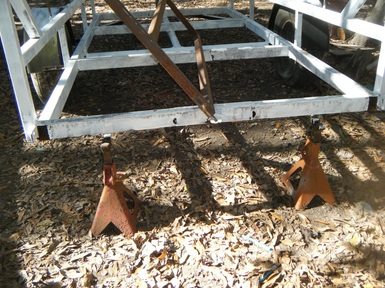
I have these jackstands from the time when I did this sort of work regularly. With the front lowered, center these under the back.A couple construction blocks appear to be about the right length to work also.
Then use the trailer jack and jack up the front.
Then use the trailer jack and jack up the front.
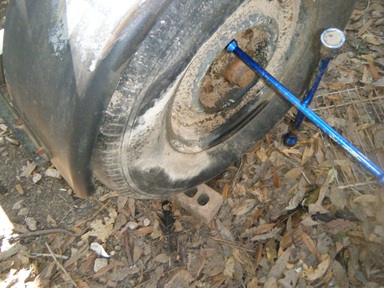
Now the nuts come off easily. If removing them makes the wheel turn just wedge a brick under the back like you see here.
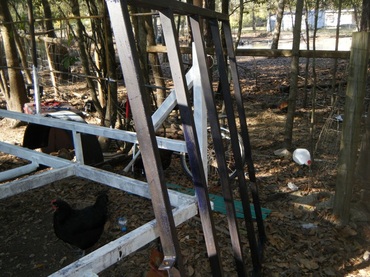
This is when the ninja alchemist struck. I had my air compressor all set up when I discovered that someone had snuck into my shop and changed my red paint to white. They even changed the writing on the label.
Under those circumstances I rust converted the tailgate and a few other pending places.
Under those circumstances I rust converted the tailgate and a few other pending places.
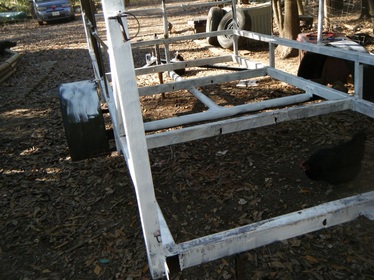
It's setting in the air with the wheels off and waiting patiently for me. Tomorrow is still supposed to be nice with temperatures in the range possible for painting.
First coat of paint.
First layer of deck.
Paint the higher areas,
Put in the second layer of floor.
Well, that's the plan anyway.
First coat of paint.
First layer of deck.
Paint the higher areas,
Put in the second layer of floor.
Well, that's the plan anyway.
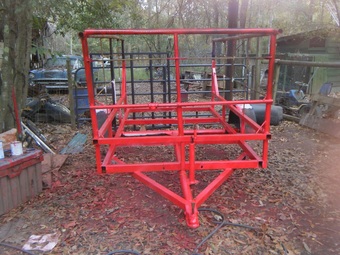
12/19/13
On schedule. My schedule just called for me to get the first coat applied before the rain. I can't say it's perfect but it will withstand bad weather better than the primer. All primer that I know of absorbs water.
I was trying to cover flat surfaces that were exposed to rain (ie the frame) and I managed to cover that.
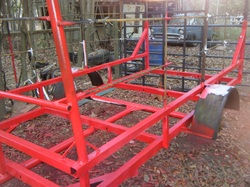
I will probably elect to make the fenders brown or black and maybe the tailgate also. I can see one cross piece that wasn't done well on the bottom. Amazingly I found the bottom of the frame to be the least deteriorated part of the trailer. No snow means no salt and that seems to be a good deal.
12/31/13
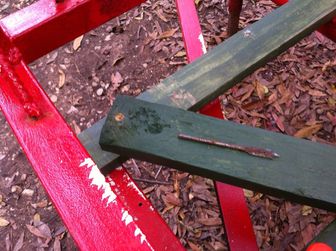
How do you get away with using 2" screws when you are attaching 2X4 lumber. They are actually 1 1/2 " inches thick but the screws are still too short. My preferred method is to countersink the screws.
Countersinking means drilling a hole in the board that is larger than the head of the screw and deep enough that the screw goes deeper. This spade or paddle bit is what I used.
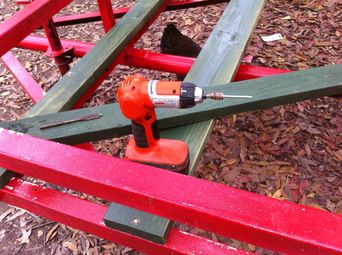
So once the holes were countersunk I completed a hole through the wood with a small bit. Then I used 2" self tapping screws to screw them to the metal crosspiece. There was about an inch of screw going into the metal.
I filled the hole with paint to prevent the screw backing out.
I filled the hole with paint to prevent the screw backing out.
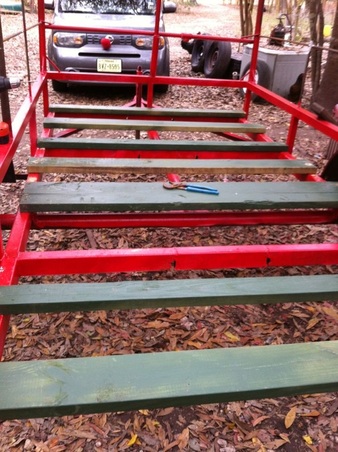
It wound up looking like this. If I needed to bridge a spot that had no metal cross piece I used 2X6 lumber.
Over the axle I used a 2X12 piece and will probably support it with a piece between the axle and the 2X12.
Mom always said that a pessimist used both belt and suspenders. I tend to subscribe to that so I try to over-engineer spots that are subject to a lot of stress.
Over the axle I used a 2X12 piece and will probably support it with a piece between the axle and the 2X12.
Mom always said that a pessimist used both belt and suspenders. I tend to subscribe to that so I try to over-engineer spots that are subject to a lot of stress.
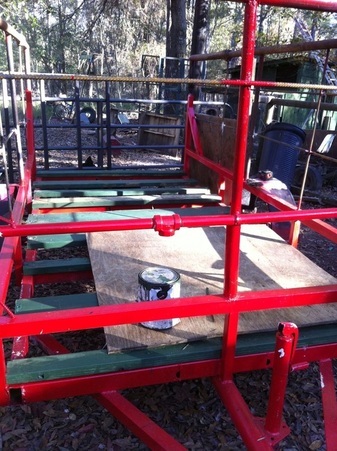
Then there is the half inch plywood. Actually it's 15/32" or some such nonsense. I had them on hand and salvaged them from another purpose. I cut them and fit them by laying them on the crosspieces loose before I did anything else.
Once they were cut to the correct size, I painted one side and placed it down. I didn't bother letting it dry before I did that. The worst that could happen is that the paint would stick.
Once they were cut to the correct size, I painted one side and placed it down. I didn't bother letting it dry before I did that. The worst that could happen is that the paint would stick.
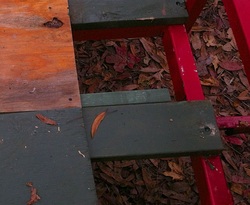
If it all fit the first time it was probably someone else that did the job. The little 2X4 here is because the plywood couldn't completely span the gap. Just a piece of 2X4 that was screwed to the piece that was originally intended to serve as stud. Worked perfectly. The wood that goes on top of this will have it's joint at another spot. Plenty strong enough.
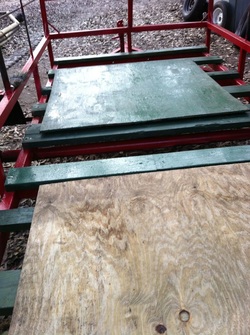
Cut and flip.
Again, this green paint is water based for external use. I coated it heavily, then flipped it over and screwed it down.
Again, this green paint is water based for external use. I coated it heavily, then flipped it over and screwed it down.
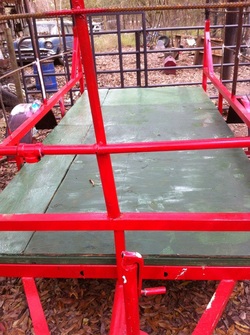
Wound up looking like this.
I will cover with 1/2" oriented strand board (OSB). Now with something to stand on I will rust convert the top and paint the whole trailer.
I expect the sprayer will hide any green by covering it with oil based red.
I will cover with 1/2" oriented strand board (OSB). Now with something to stand on I will rust convert the top and paint the whole trailer.
I expect the sprayer will hide any green by covering it with oil based red.
1/16/14
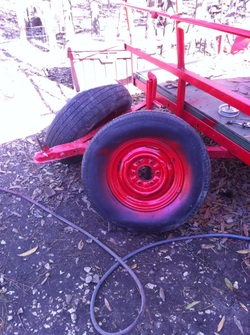
Everyone needs shiny wheels. The tires are dry rotted so no need to go to the expense of removing them to paint.
Everyone needs shiny wheels. The tires are dry rotted so no need to go to the expense of removing them to paint.
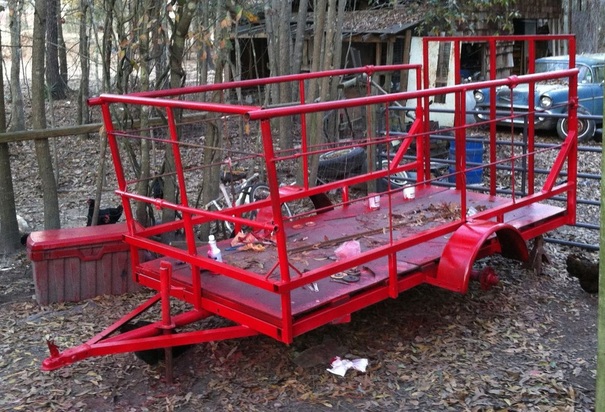
Wheels and hubs painted. Lug nuts started before painting hubs. Red paint everywhere. Tailgate mounted and painted but not finished.
I still don't have a vehicle to pull this so am not in a real hurry. Will put on the wheels tomorrow and take off the jack stands. When I can pull it I will go get three pieces of oriented strand board (OSB) for flooring and two tires that aren't dry-rotted. I have two toolboxes that I intend to mount permanently and may come back with one more picture. That will have a tow vehicle and a finished trailer. Rome wasn't built in a day and neither was this trailer. However, I think there are a batch of potential miles here. I expect it to outlast me.
I still don't have a vehicle to pull this so am not in a real hurry. Will put on the wheels tomorrow and take off the jack stands. When I can pull it I will go get three pieces of oriented strand board (OSB) for flooring and two tires that aren't dry-rotted. I have two toolboxes that I intend to mount permanently and may come back with one more picture. That will have a tow vehicle and a finished trailer. Rome wasn't built in a day and neither was this trailer. However, I think there are a batch of potential miles here. I expect it to outlast me.
 RSS Feed