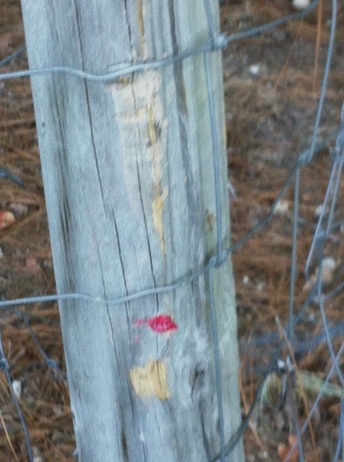
This is the corner post at the front of our property. The scrapes in the post are from a car that decided to use our front ditch as a gymkhana course. The little red mark is embedded taillight fragment.
I imagine this person was a graduate of the same driving school of thought as the lowlifes that ran over our geese. This grande imbecile (modern latin) did one thing that was good (therefore, unintentional I am sure). That was to convince me I needed to move the fence back. Had he taken down the front fence there would have been a panic stricken llama running up and down the block or possibly killed.
The fence was very easy as I am in the habit of just stapling fence to trees. Straight lines are vastly overrated unless they maintain a property line. You can catch the article about this incident here:
http://www.grangerlandrfd.com/improving-the-gene-pool.html
We had fence that we first installed when our jack (Eeyore) tried to dismember our new miniature gelding. Poor feathers. He came to his new home trying to meet new donkeys with absolutely no ulterior motives (a gelding after all). The next thing he knew 700 pounds of testosterone laden jack was trying to rip his face off. It took tying the jack to a tree for a couple days. While he was tied, I put in two range fences topped with barbed wire to keep the two apart. We bought two llamas to keep him company but he thought they were from another planet. It seemed nothing worked out well. No sense in retelling that story as you can click and find it here:
http://www.grangerlandrfd.com/why-we-became-llama-ranchers.html
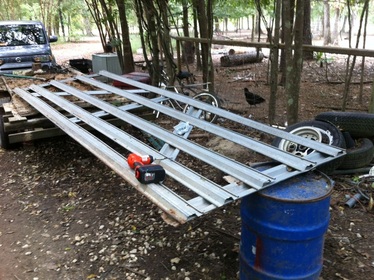
Between the contractors putting Lake Wilcox right on my fence line and the lowlifes ripping through our ditch I had to go back to work.
I hope you find this article chock full of redneck expertise. The gates were where the real work started for me. Honestly, the first time I did this took forever. Now it doesn't. Hope it saves you some time.
I hope you find this article chock full of redneck expertise. The gates were where the real work started for me. Honestly, the first time I did this took forever. Now it doesn't. Hope it saves you some time.
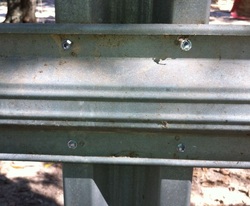
This gate had been hanging for over ten years. It sagged worse than my shirt front. The screws I bought were TEK self tapping screws and you should just buy a driver to fit at the time. No need to look through all the old tool boxes trying to find where you left it. I'm pretty challenged in that regard as well as in choosing the size the fits. If you do not specify self tapping screws you will have to drill a pilot hole every time you place a screw. Self tappers drill their own holes.
By the way, if you don’t have a drill (corded works also) just hire someone to do the job. You are about to get into a fight with no weapons.
This gate had been previously welded and the metal was too thin to hold. As you can see, I put four of these self tapping hex head screws in this overlay (cross piece). I did that in every overlay except that the tops and bottoms sometimes only had room for three. The gate was stiff when I finished with this and ready to hang.
If you are good with a mig welder you may prefer that route.
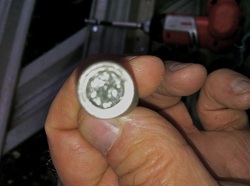
This led to a small problem. You wouldn’t think the magnet in the driver was this strong but it is. Or else, the metallurgy was lacking. I hope the metallurgy is ok because in 10 years I don't want to do this again.
Regardless of the cause, every little metal shaving that came off the hex head screw clung to the driver. I was continually cleaning it and not very successfully. The driver was so full that the head of the screw would not fit. Time to look for a non-magnetic driver. Off to the store.
Regardless of the cause, every little metal shaving that came off the hex head screw clung to the driver. I was continually cleaning it and not very successfully. The driver was so full that the head of the screw would not fit. Time to look for a non-magnetic driver. Off to the store.
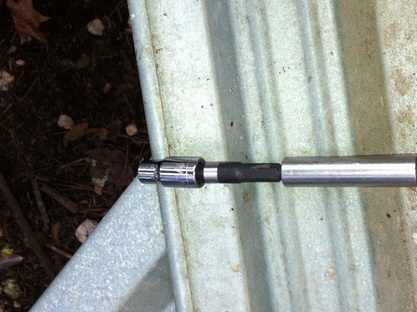
This was my answer. You just get a small quarter inch driver that fits in a drill. You might want this anyway. If you have any odd size jobs it means you can use a drill driver just by finding the right socket.
As some of my gearhead friends say "your mileage may vary" YMMV. I was never sabotaged by shavings before so maybe you don't need to do this. Anyway, I continued to rebuild the gate with no further problems.
As some of my gearhead friends say "your mileage may vary" YMMV. I was never sabotaged by shavings before so maybe you don't need to do this. Anyway, I continued to rebuild the gate with no further problems.
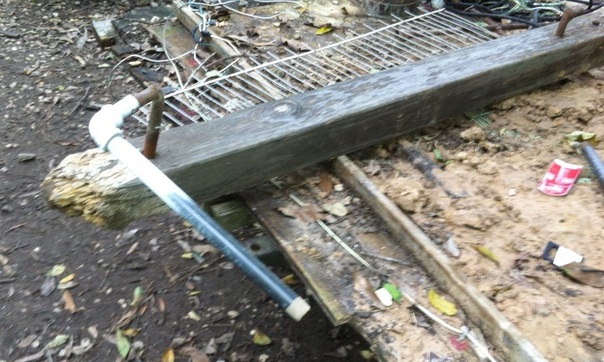
When the gate was done I needed to work on the gate post. I actually did two in the same day and here you see what was involved in removing the gate hangers. I wanted to reuse them.The gate hangers are a long half inch threaded bolt with the end bent in a 90 degree turn. I find that the more specialty tools you have for a job the better you are. This is my specialty tool for the easier jobs. You have to be careful of the security with expensive tools like this. Someone had confiscated it and was using it as an archery range distance marker when I rescued it. The harder jobs need a bigger tool. If you cannot afford a fine set of specialty tools like mine just buy a half inch pipe nipple and screw a 90 degree fitting on the end.
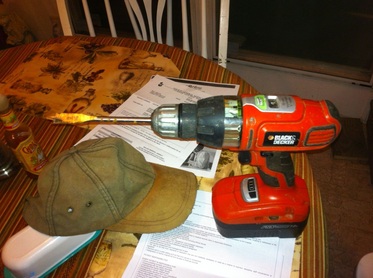
The end of that bolt is pointed but you still need something to start the penetration. We measured the bit (called a spade bit or paddle bit) against the bolt and discovered that 9/16 should work. It should be the size of the body of the bolt, minus the thread. I used the bit for the first half of the needed depth, then used the hanging bolt and tool to make it's own hole. Fits tighter that way.
This bit is for wood. You can use the sharp tip for a pilot hole for small screws and it works good. You can use it once only on metal. Then you can throw it away.
The drill is an 18 volt cordless drill. When I bought it I bought a set that also contained a circular saw, a reciprocating saw (sawzall), and a flashlight. I think it must be 10 years old and I have been real pleased. If you just want a drill I am told that some of the small, new technology, 12 volt drills are much lighter and work just as well. All I know for sure is that I can also buy a chainsaw with an extended run battery that fits all the tools. There are probably a couple other things as well. It is versatile.
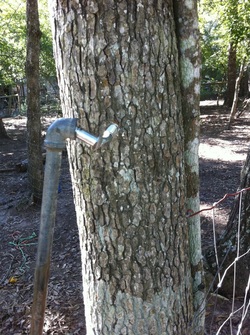
This is a harder job. This is a bigger tool. It is longer and the mouth is bigger. It makes me look stronger to anyone who doesn't understand leverage. Pipe that is straight works on the top bolt but you must be able to rotate the bottom one. As you can see I am hanging the gate on a tree. Won't have to wait for the ground to compact.
Measure the distance, drill the holes, put in the bolts, and hang the gate. The top bolt had to extend just a bit further out since the tree was not exactly plumb. It was close.
The tree is a great deal stronger and placed in the ground more solidly than a post could be. It also has the advantage of growing more tightly around the bolt as it gets older. Instead of becoming looser it becomes tighter. You have to be lucky to have a straight tree close to where you want the gate. I was lucky although the tree picked the spot. The gate went where it was told.
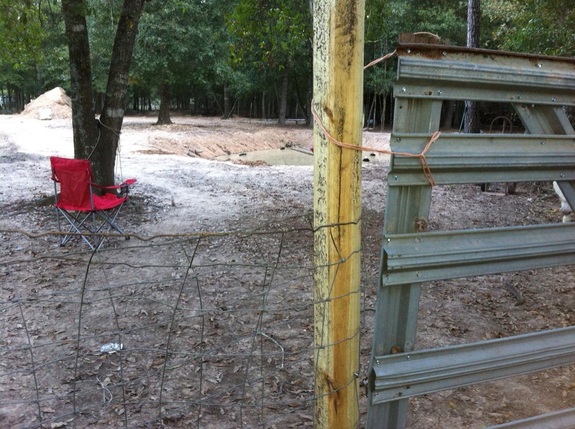
Here for your viewing pleasure is lovely Lake Wilcox with several resident ducks. Also, on the left is our Archery Range. The target is sitting on the pile of dirt. I actually prefer to think of that as our backstop, not a pile of dirt.
The real purpose of the picture is to demonstrate how simple it can be to complete fencing. A landscape timber, a couple staples, and a posthole. Not seen here is the freight dolly. It was laid on it's back and the blade was the right size to support this end of the gate when it was hung.
The real purpose of the picture is to demonstrate how simple it can be to complete fencing. A landscape timber, a couple staples, and a posthole. Not seen here is the freight dolly. It was laid on it's back and the blade was the right size to support this end of the gate when it was hung.
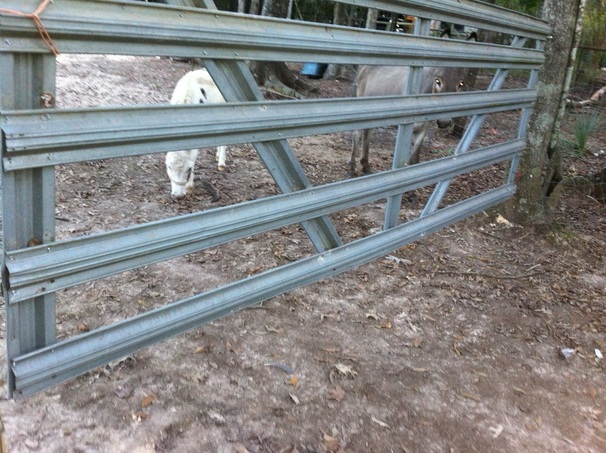
Cruz and feathers approve of the whole thing. It is a little high because of the fat base of the tree. If I add sheep or goats I will need to attach a little fencing to the bottom. That may come in time.
Calling fence hanging an art is a little attempt at humor. I had to think hard on a way to get the hanging bolts in all those years ago and every step was a struggle for mastery. Hope this saved you a little time and hope you enjoyed the article.
Calling fence hanging an art is a little attempt at humor. I had to think hard on a way to get the hanging bolts in all those years ago and every step was a struggle for mastery. Hope this saved you a little time and hope you enjoyed the article.
 RSS Feed